Manual: Retail till & billing
A step-by-step training manual for cashiers and till staff - signing in, opening the day, building a bill, discounts, payment, and closing out.
This is the day-to-day manual for anyone who works the till: cashiers, shift supervisors, and store owners. It walks the exact same flow you'll use on a real shift, with real screens from the app.
If you're looking for admin setup (products, suppliers, purchase orders, reports), see Manual: Retail admin & back office instead. This page is the till, front-to-back.
Signing in
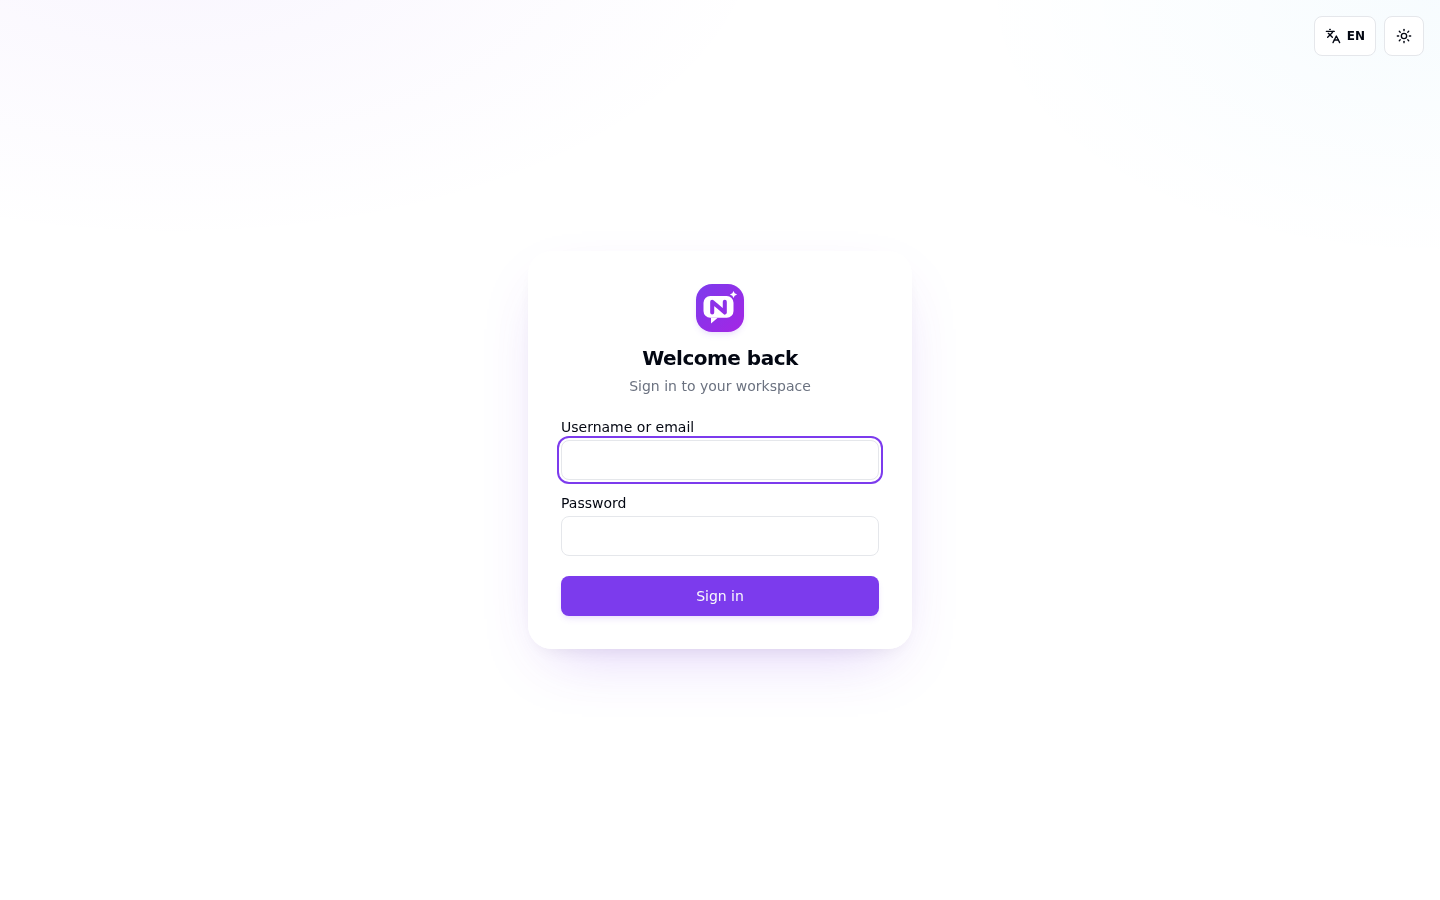
Username or email – Enter the username or email your admin created for you.
Password – Enter your password. Never share it - anything done under your login is attributed to you.
Sign in – Click Sign in. You'll land on your workspace's home screen.
Forgot your password? Ask an admin to reset it for you from Settings → Business → Users
- they'll hand you a one-time temporary password, which you then change yourself from Settings → Change password.
The Commerce POS hub
Once signed in, use the Commerce POS button pinned at the top of the sidebar (or Settings → Open Commerce POS) - both only appear if your workspace has Retail POS enabled. This opens a separate till-focused app with one screen per task - no hunting through menus mid-sale.
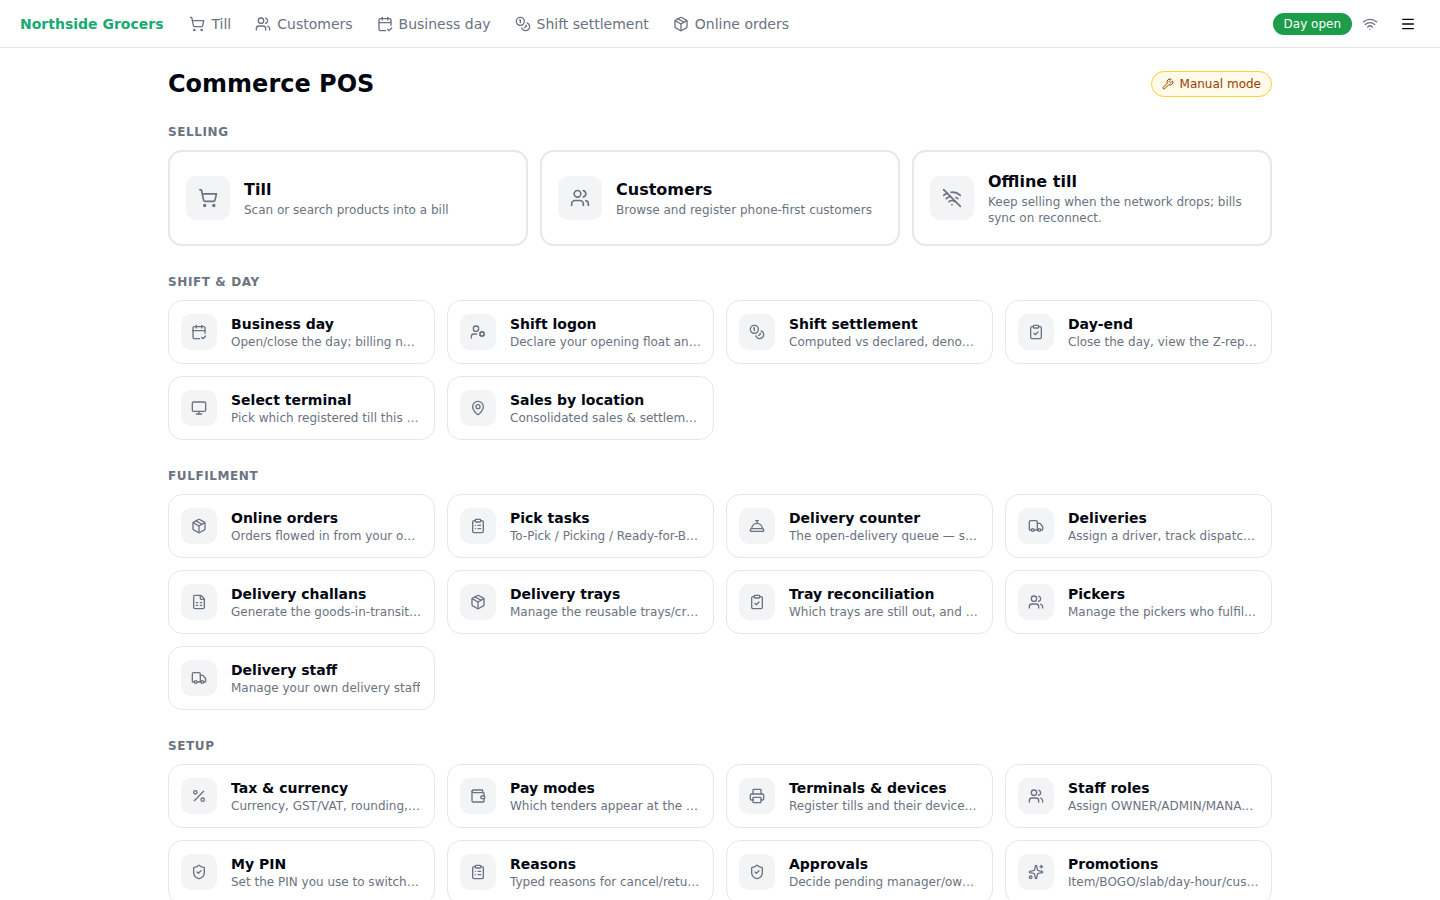
The hub is grouped by what the work is:
| Group | What's in it |
|---|---|
| Selling | Till, Customers, Offline till - the large tiles, because they're most of your day |
| Shift & day | Business day, Shift logon, Shift settlement, Day-end, Select terminal |
| Fulfilment | Online orders, picking and delivery (only with the Online channel module) |
| Setup | Tax, pay modes, terminals, staff, promotions, loyalty, reports - admin work, see the admin manual |
The bar that follows you
You don't have to come back to this hub to move around. Every screen in the POS carries the same bar along the top:

- Till, Customers, Business day, Shift settlement - one tap from anywhere.
- Day open / Day closed and a connection indicator, always visible.
- The menu on the right holds "Open the full admin app" and sign out.
The Kitchen POS uses the identical bar and the same tile grouping. If you run both a shop and a restaurant, learning one teaches you the other.
Opening the business day
Billing needs an open business day for the location - this is the accounting unit every till session and Z-report rolls up to. An owner, admin, or manager opens it once, at the start of trading; nobody else needs to think about it again until close.
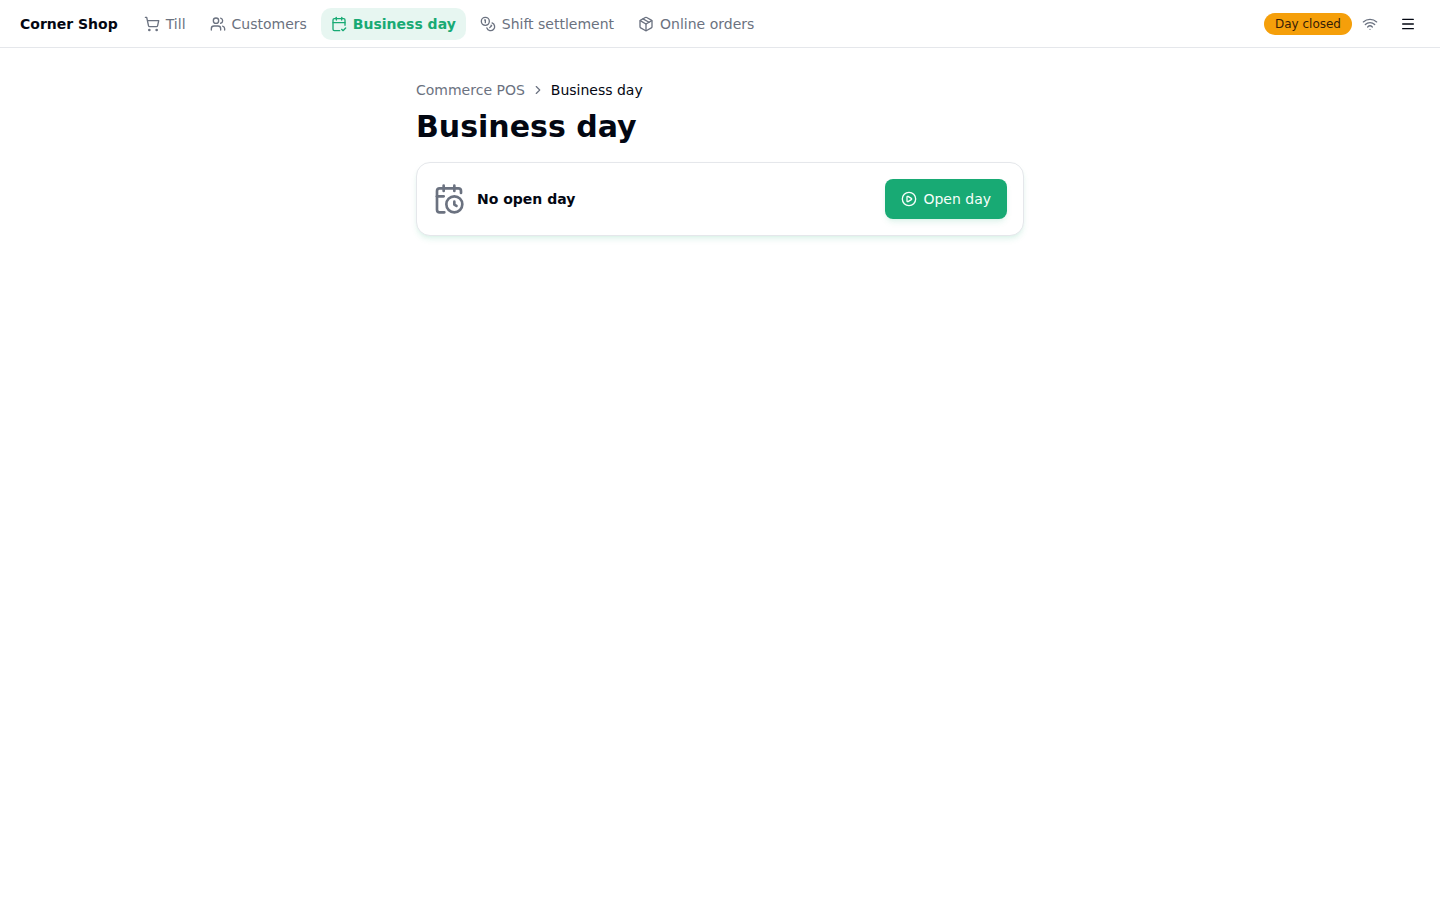
Open day – Click Open day. The day is stamped with the current date and time, and every till on this location can now bill.
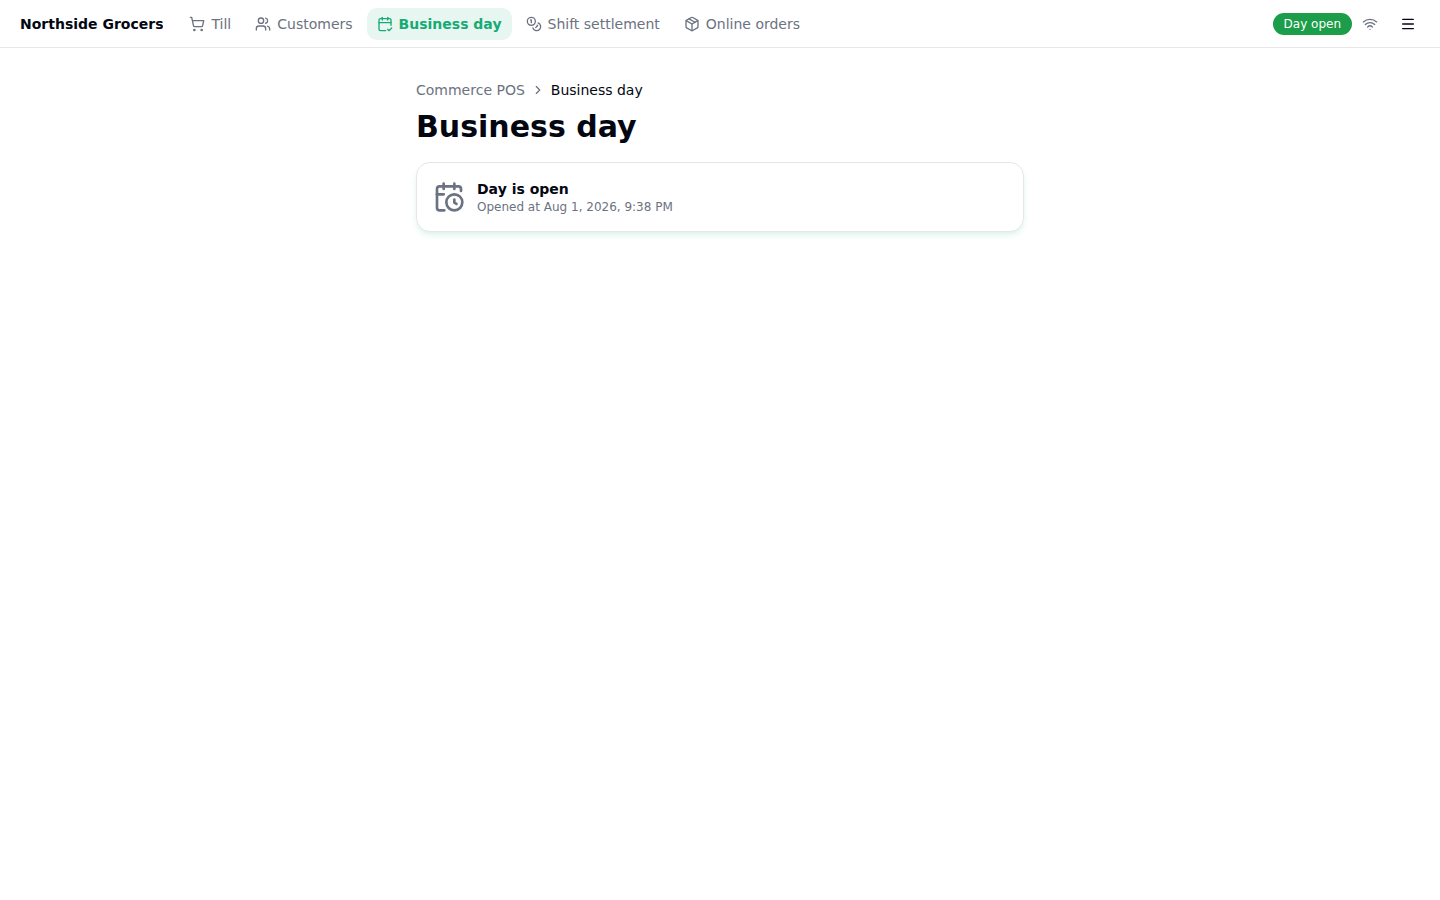
You can't open a second day for a date that's already been used (even if it was already closed) - the system blocks it with a clear message pointing you at reopen instead, so a day's own figures never silently get overwritten.
Choosing your terminal
Each physical till device is registered once by an admin (see the admin manual). Every time you sit down at a till, tell the app which one you're on:
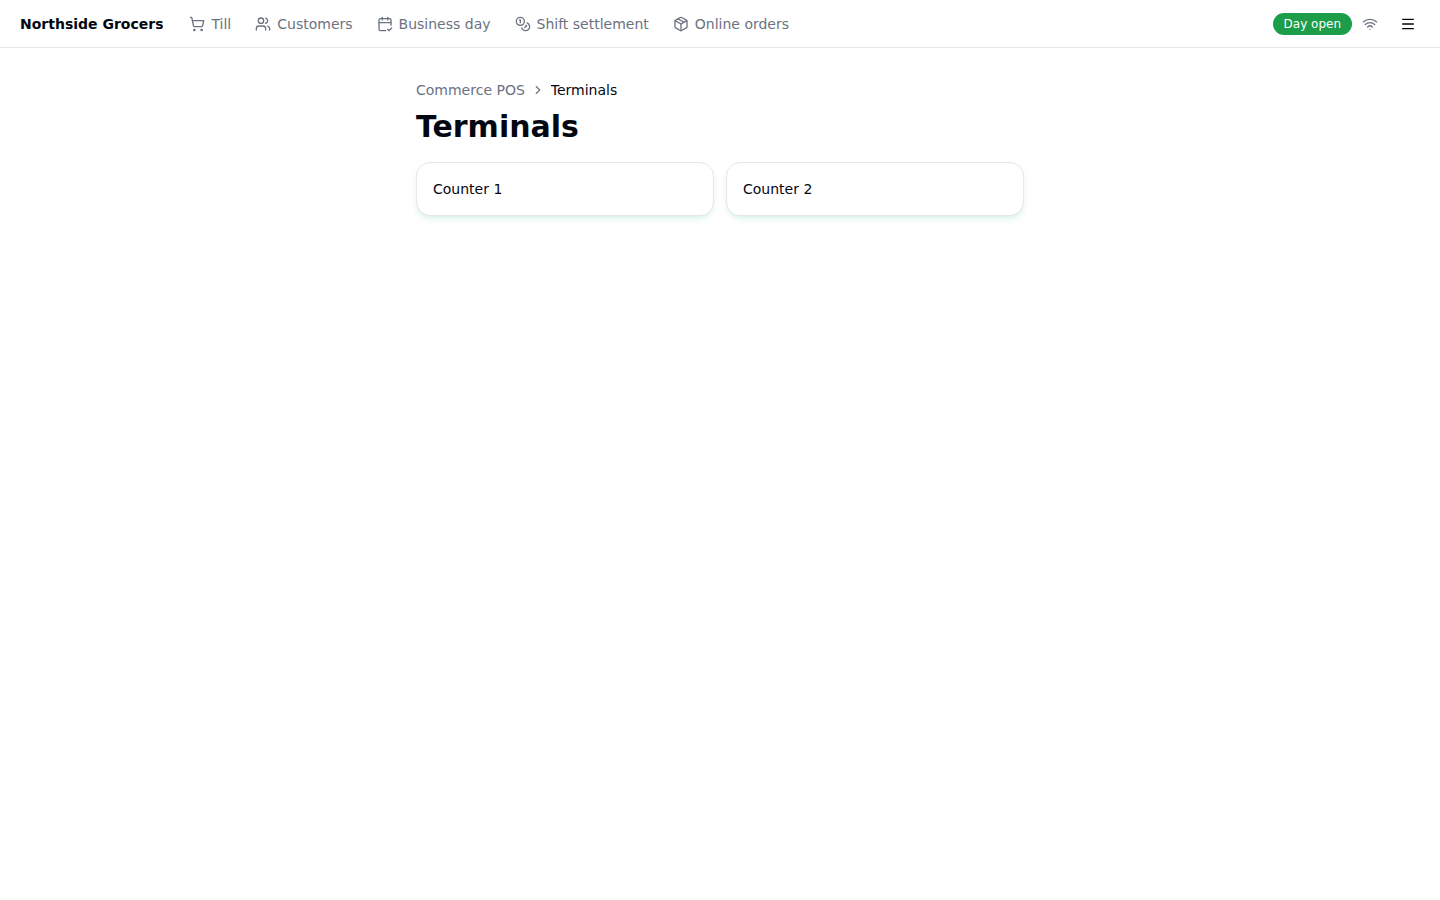
Pick your terminal – Click the terminal name (e.g. "Counter 1"). The choice is remembered on this device.
Starting your shift
Shift logon declares your opening float (the cash you're starting with) so the shift's own figures reconcile correctly at settlement.
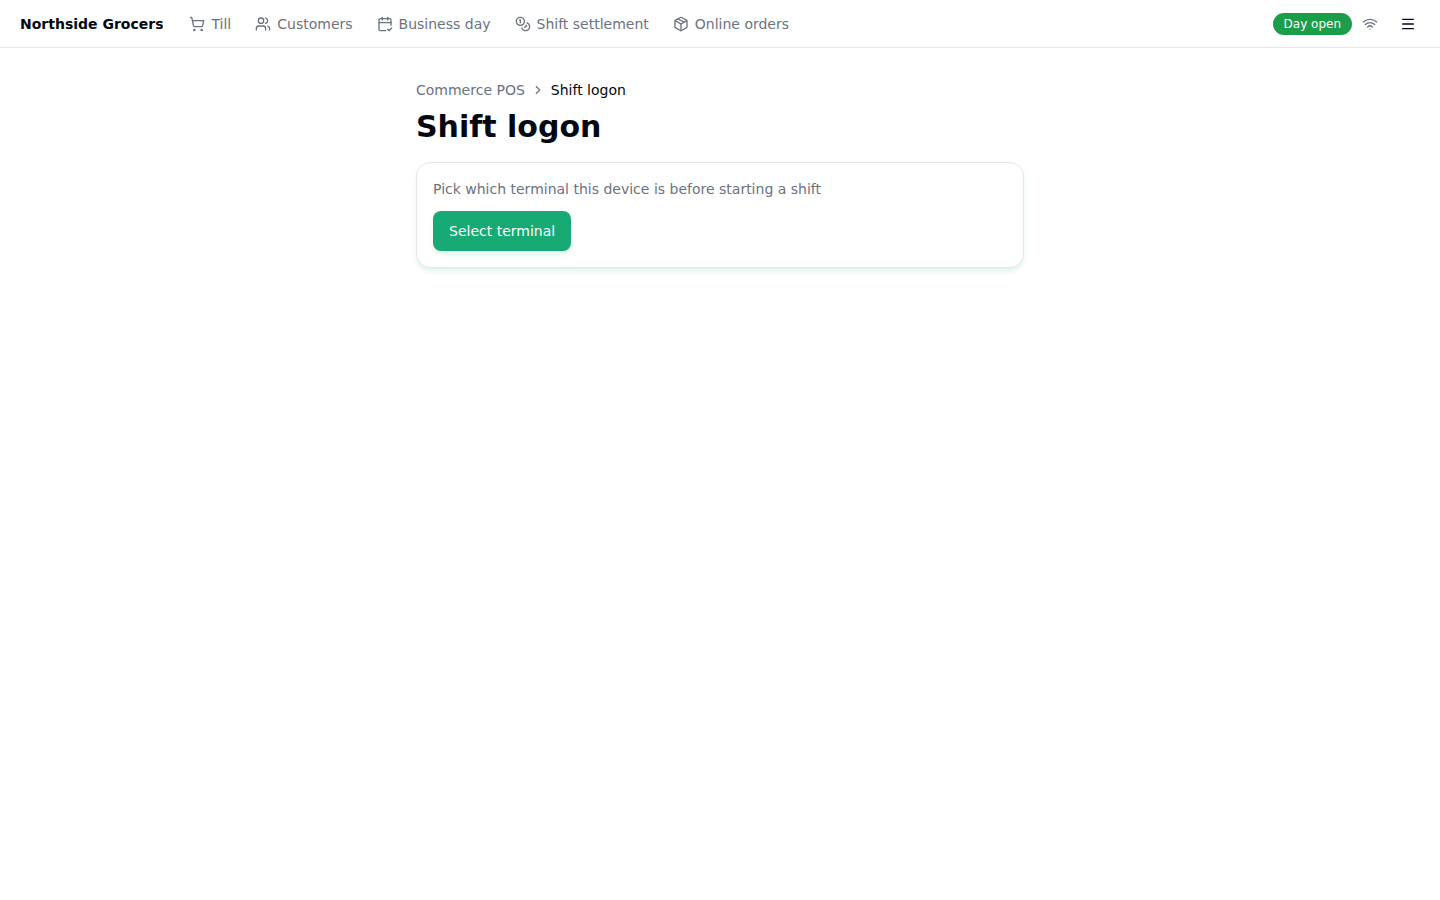
Opening float – Enter the exact cash amount in the drawer right now, then start the shift.
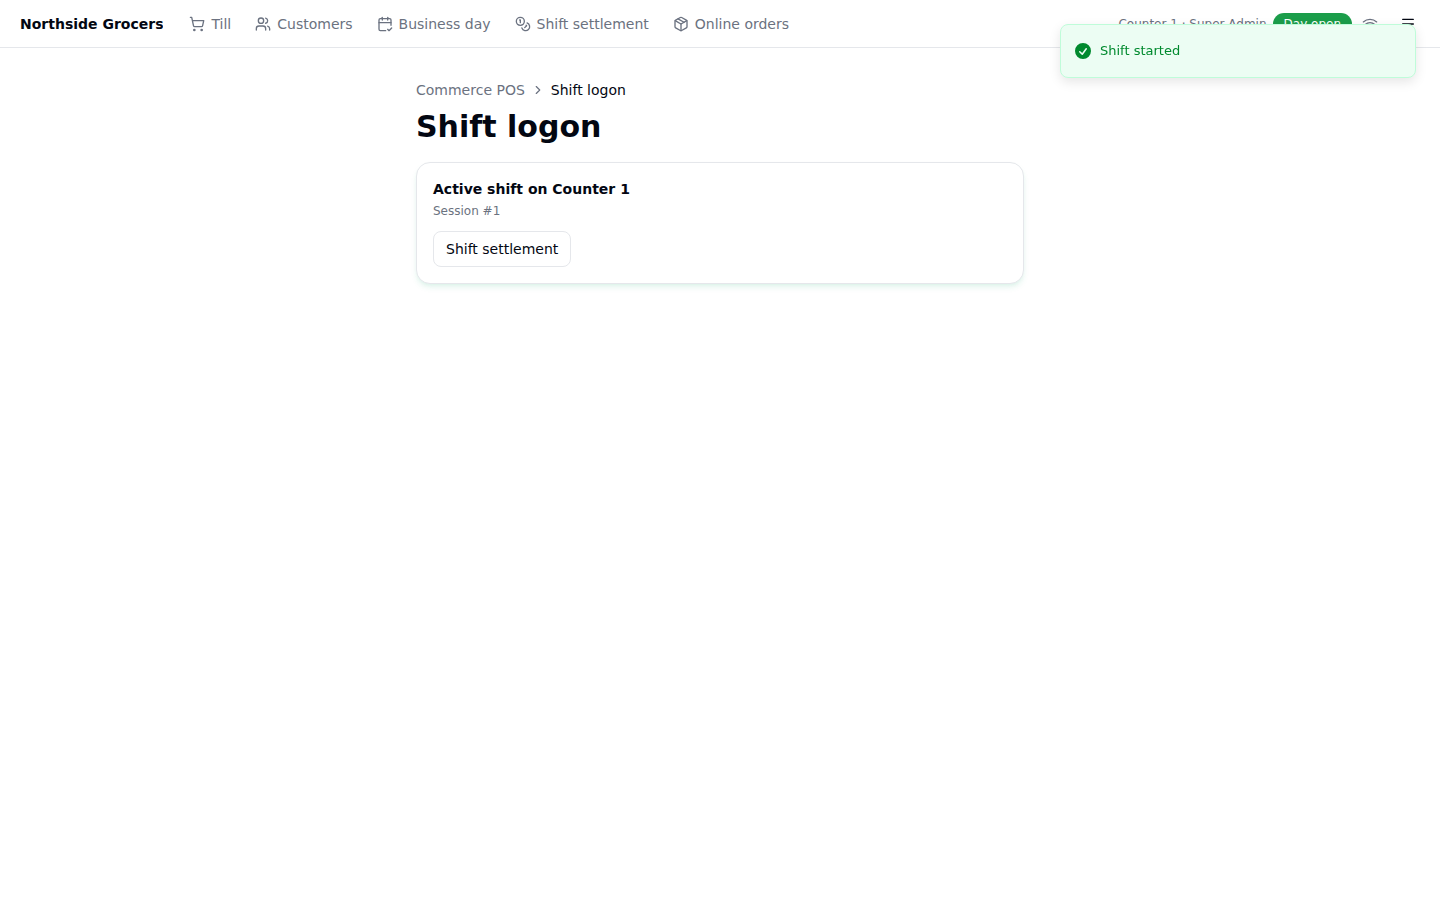
A terminal is locked to you for the shift, and you're locked to that one terminal - so two cashiers can never accidentally share a till mid-shift.
Building a bill
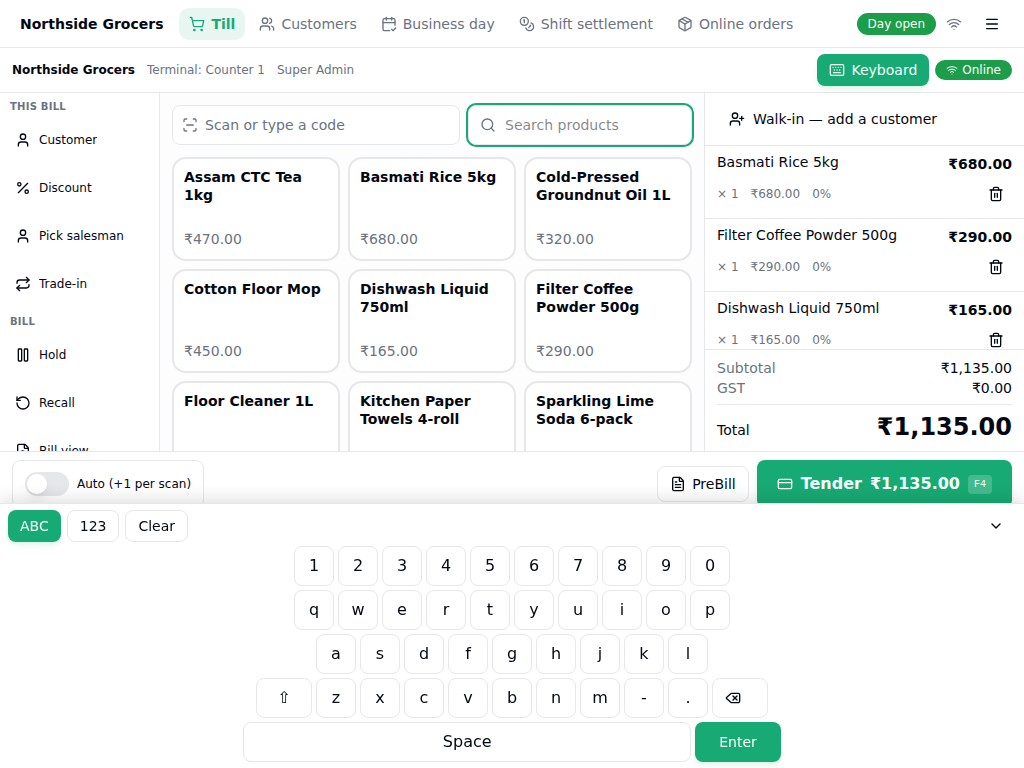
This is the Till - the screen you'll live in all day. It's laid out like a dedicated till terminal rather than a web page: the POS bar across the very top, then a thin status strip, the function keys down the left, the product tiles in the middle, the running bill on the right, and a tender bar along the bottom.
Nothing on it scrolls as a page. Only the tile grid and the bill list scroll, inside their own columns - so the total and the Tender button are always on screen, even on a small 1024x768 till display.
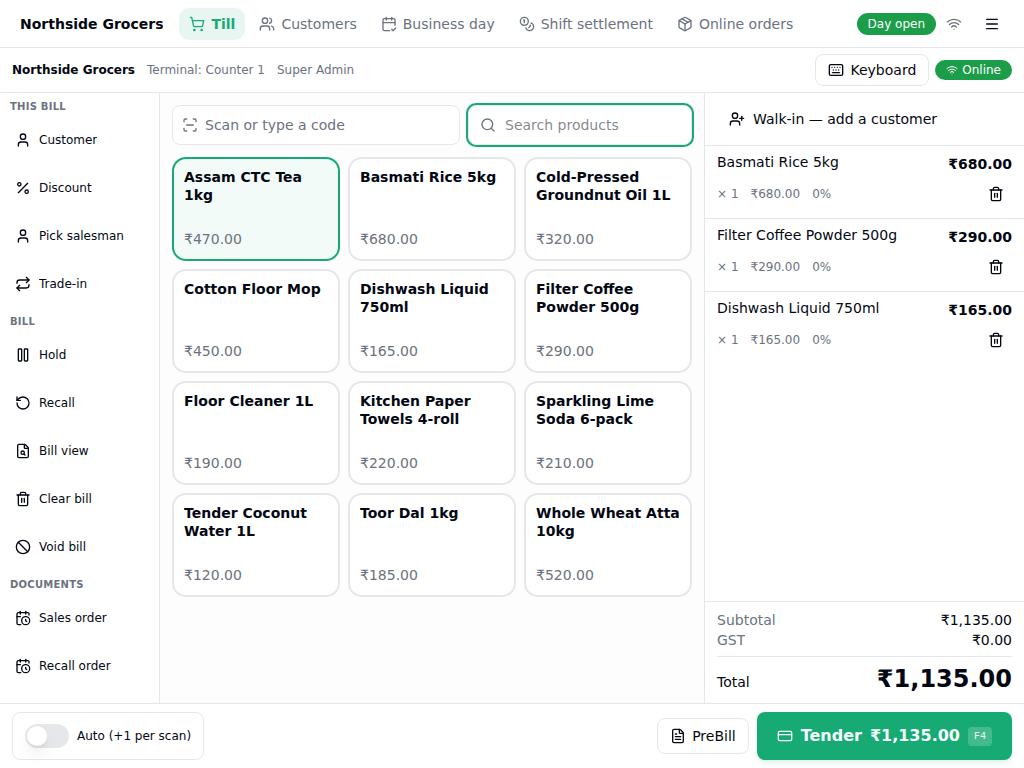
Function keys, all on show – Everything you need between bills sits on one column, grouped by job - there's no menu to open and nothing to scroll right for.
Scan, search or tap – Scanning is still the fast path - the scan box is always focused for a barcode gun. The tiles are for anything without a barcode, and for working purely by touch.
Category chips – Tap a category to filter the tiles. All shows everything you can sell.
The running bill – Every line you add appears here with its quantity and price. Totals sit pinned at the bottom of the column.
Tender, with the amount on it – The big button carries the live total, so you never have to look up to check what you're charging.
Each bill line shows the quantity, the price actually charged and the GST% for that item; the Subtotal/GST/Total underneath always reconciles to the sum of the lines.
The function keys on the left
Retail rings up by scanning or searching, so the left column earns its width better as actions than as categories. Everything is on show there, grouped by the job you're doing:
| Group | What's in it |
|---|---|
| This bill | Customer, Discount, Salesman attribution, Trade-in |
| Bill | Hold, Recall, Bill view, Clear, Void |
| Documents | Sales order and Quote - save one, or recall one |
| Cash drawer | Receipt (money in), Payment (money out) |
| Terminal | Switch cashier by PIN, go to Settlement |
The bottom bar keeps only what ends a bill: quantity mode, PreBill and Tender. Those three can never be pushed off screen, however small the display.
Many of these have a keyboard shortcut (F2 Customer, F4 Tender, F6 Hold/Recall, F8 Discount, F9 Bill view). They keep working while the cursor is parked in the scan box, so you never have to click out of it first.
With no physical keyboard
Plenty of till terminals are just a touchscreen and a scanner. Tap Keyboard in the top right and an on-screen keyboard docks along the bottom, typing into whichever field you tap. It picks the right kind on its own - a number pad for money and quantities, letters for search and names.
It's docked rather than floating, so it can never cover the field you're typing into; the panes above shrink to make room. The choice is remembered, so a terminal with no keyboard stays in this mode across restarts.
Attaching a customer
Optional, but worth doing - it's what makes loyalty points, purchase history, and a khata/credit account possible.
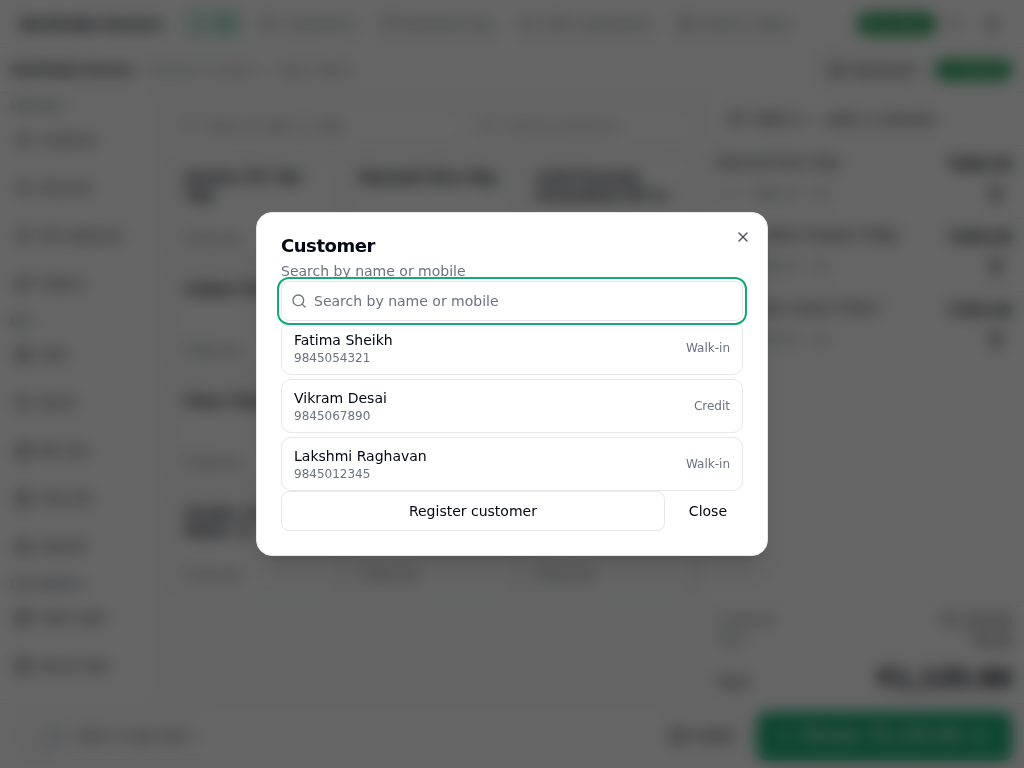
Search by name or mobile – Type a few letters or the phone number. No match? There's a "Register new" option right there - phone-first, so it's quick.
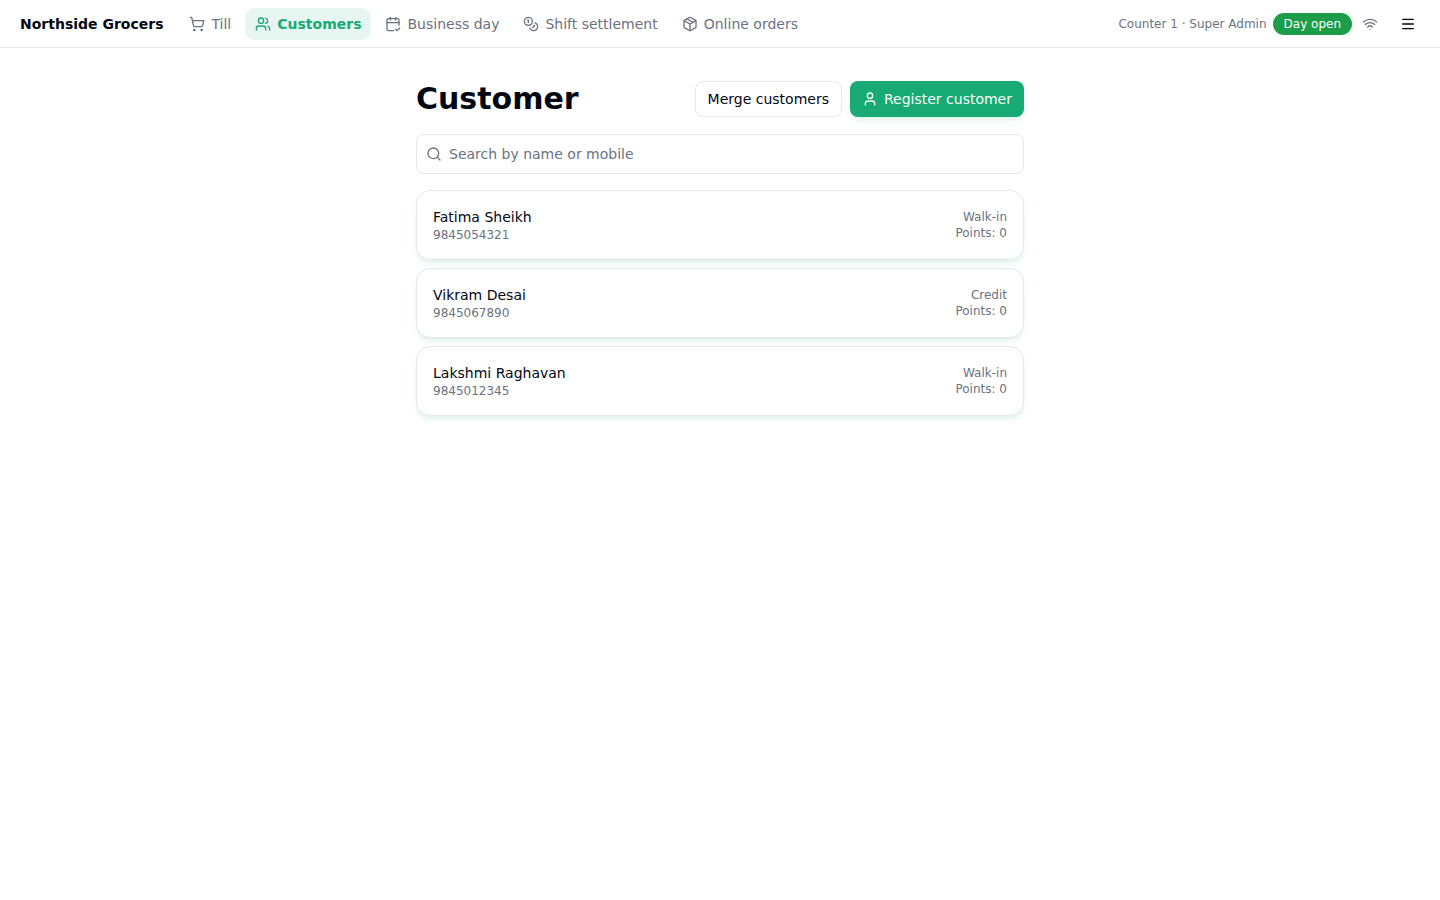
Registering a new customer
No match on search? Click Register customer right there in the same dialog.
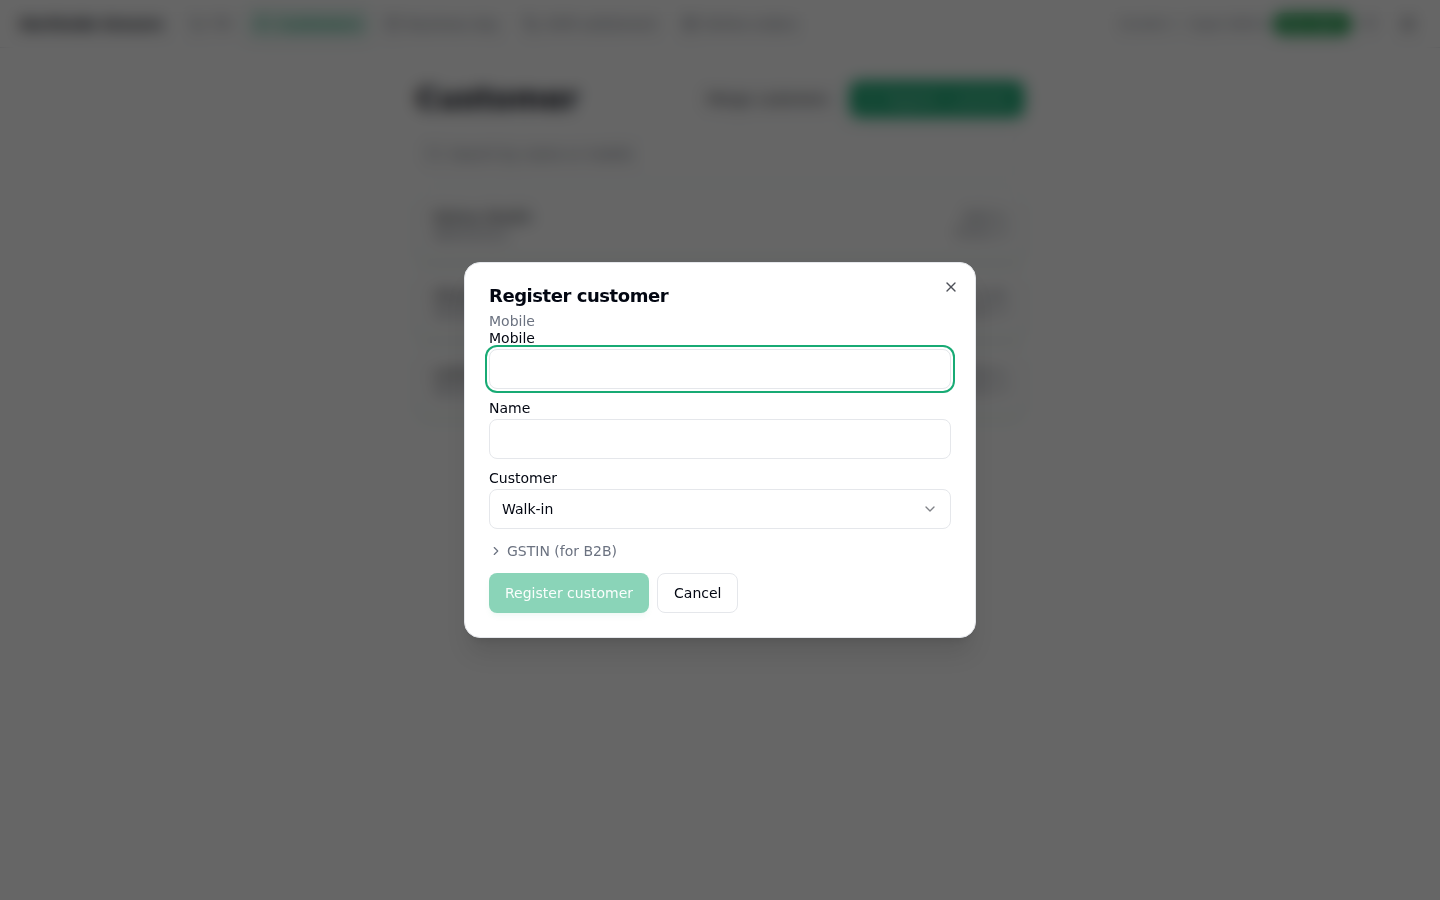
Mobile is the real identity - it's what search matches on every time after this. Name is optional but worth asking for. Customer lets you mark someone Walk-in (the default), Staff, or Credit (a khata account that can carry a running balance - set up its limit later from Customers). GSTIN is a collapsed section for a business (B2B) customer.
Once registered, the customer stays attached to the bill you're building
- their own Points balance shows right on the till, with a Redeem points button once they have enough to spend.
Applying a discount
Click Discount on the till toolbar. You can discount by a flat amount, a percent, or set a target total directly - whichever's easiest for the situation.
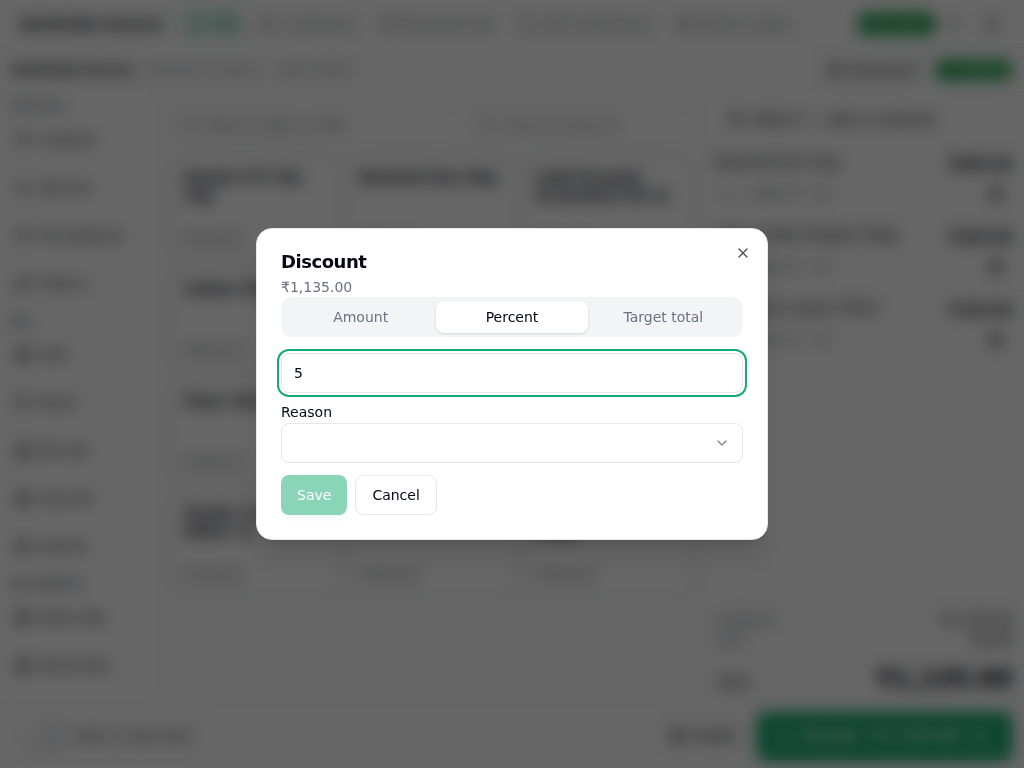
Mode – Pick Amount, Percent, or Target total.
Value – Enter the number for the mode you picked.
Reason – Pick why - this is required and shows up in reporting.
Save – Applies immediately if it's within your allowed ceiling.
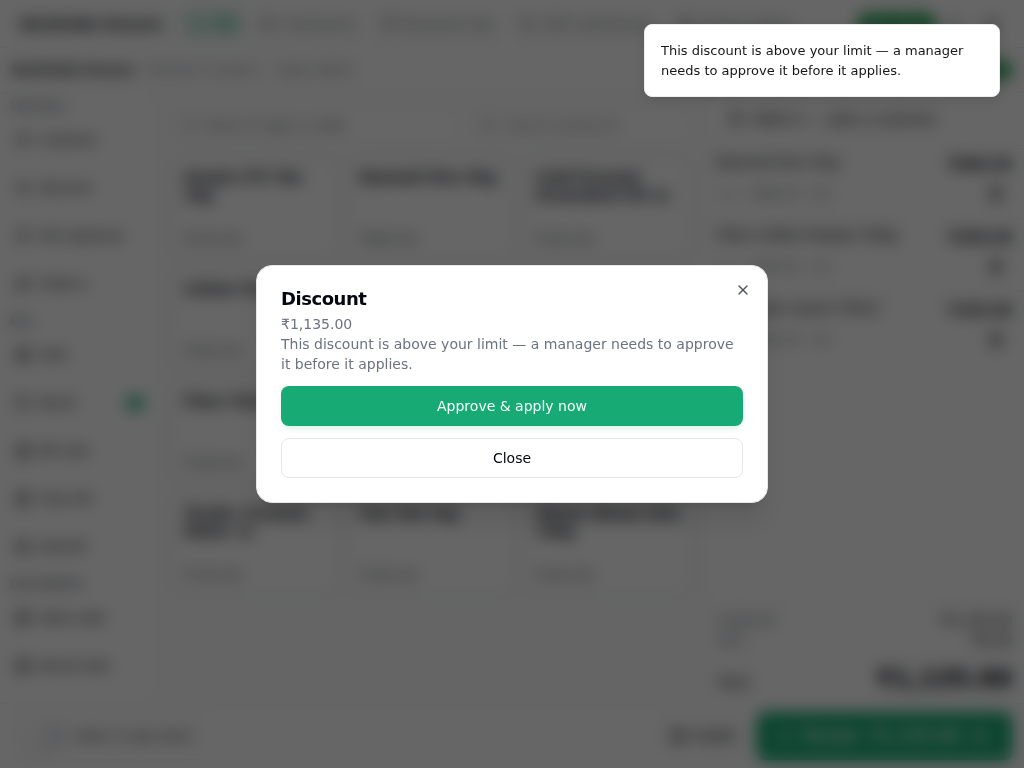
If the discount is above your allowed ceiling, it doesn't get silently rejected or silently allowed - it raises a request a manager can approve right there on the till, or later from Approvals:
Holding and recalling a bill
A customer steps away, or you need to serve the next person in line before finishing the current bill - Hold parks it so any till (not just this one) can pick it back up later.
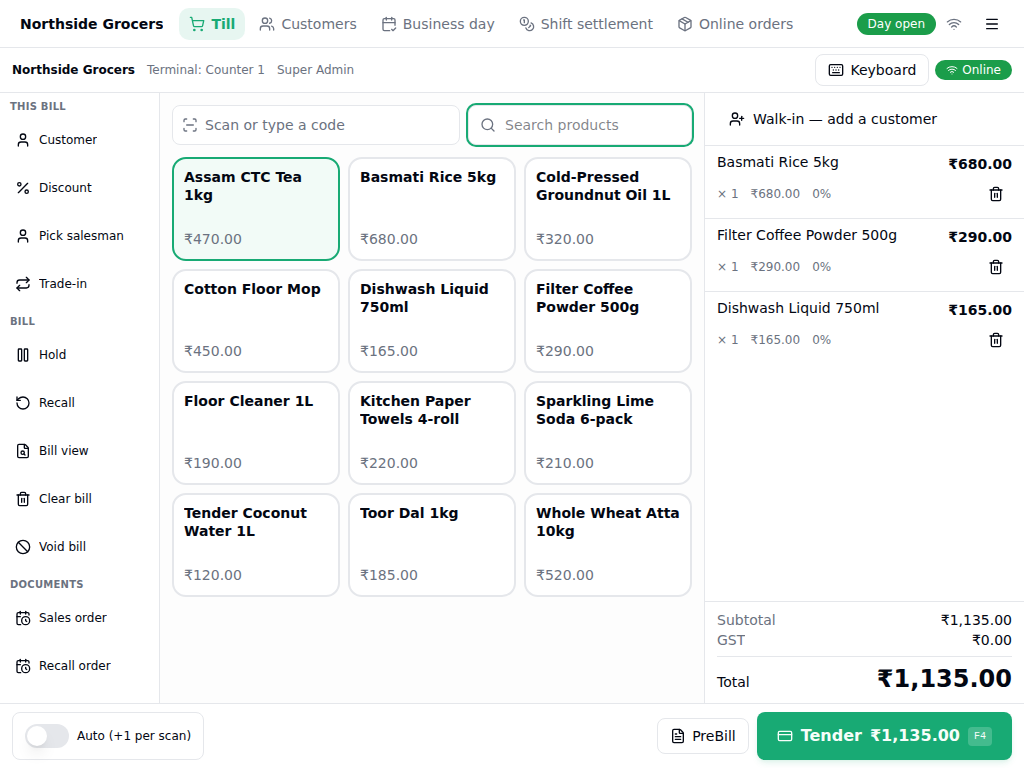
Hold – Click Hold on the till toolbar.
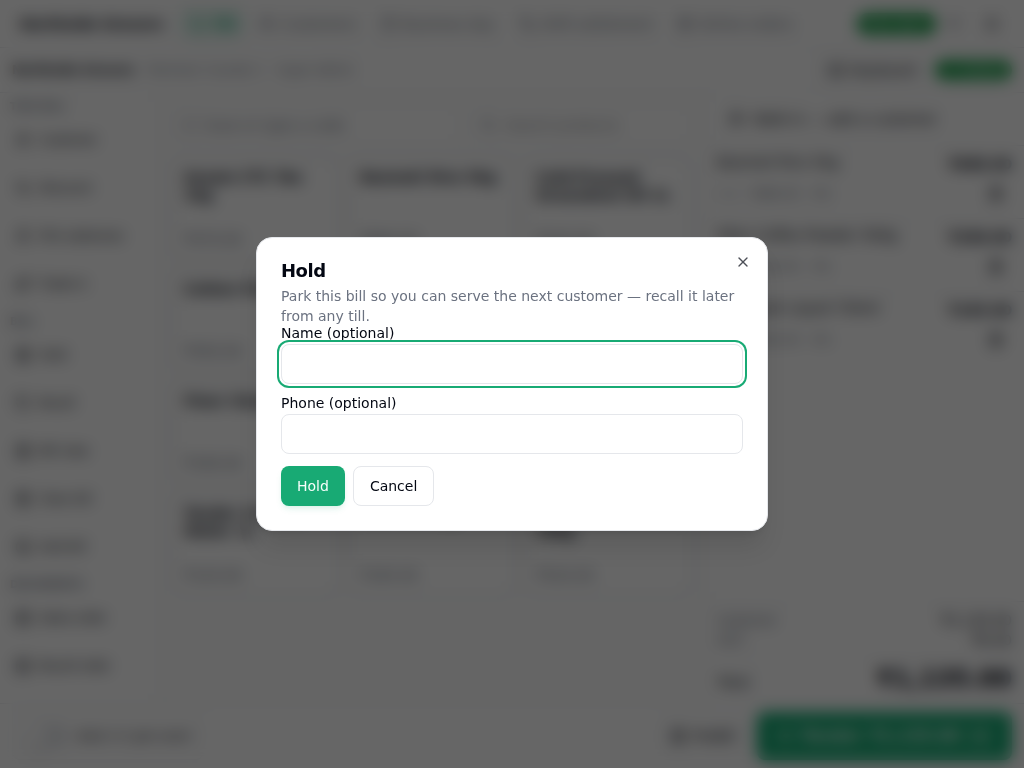
Name and Phone are both optional - useful for a takeaway order so whoever recalls it knows whose it is. The till immediately clears to a fresh, empty bill.
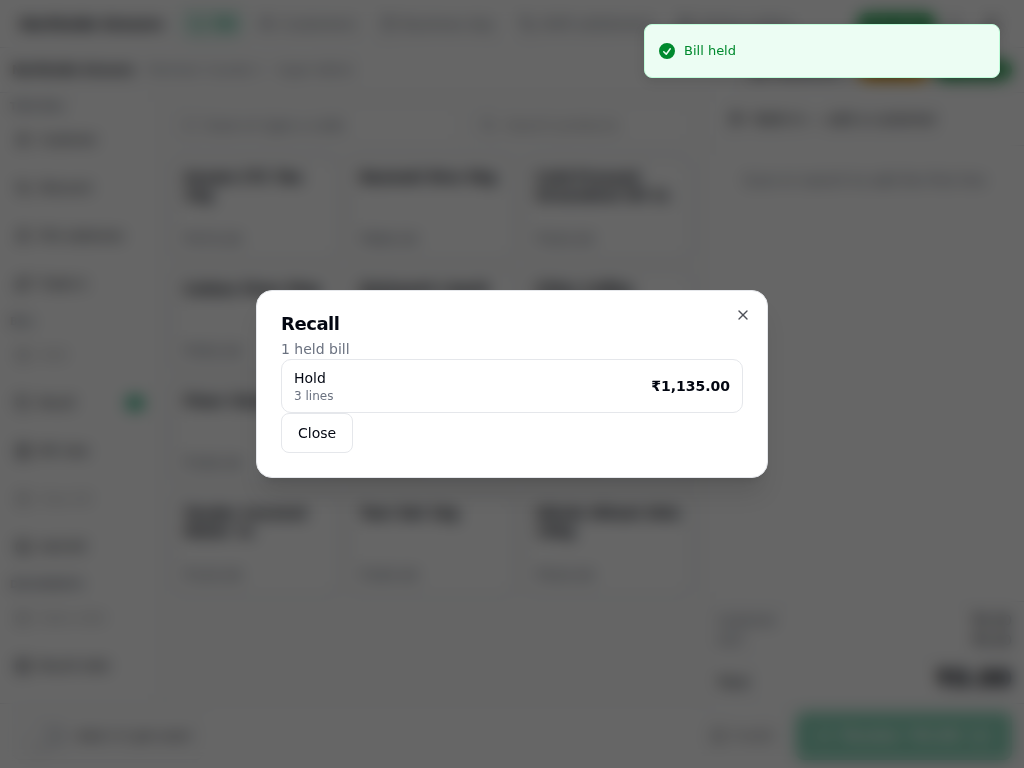
Pick a held bill – Click Recall on the toolbar from ANY terminal - held bills aren't tied to the till that parked them. Pick the one you want and it loads right back into the till, fully editable.
Taking payment
Click Tender. This freezes the bill total and opens the payment screen - you can split a single bill across cash, card, UPI, or any other pay mode your admin has configured.
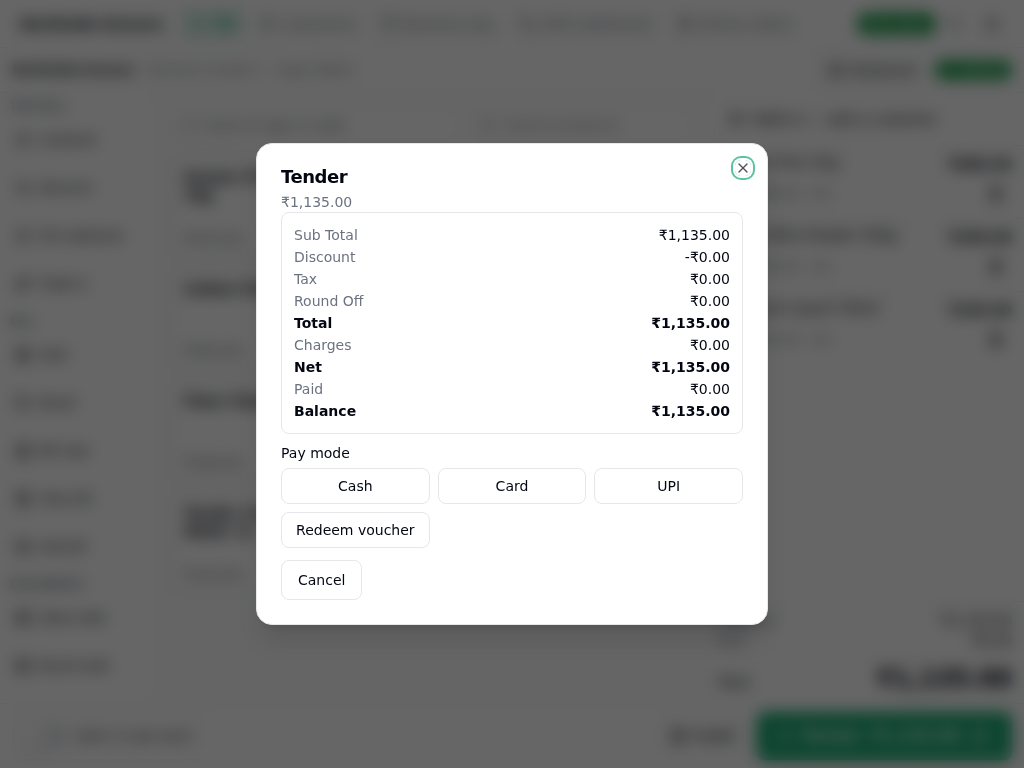
Pick a pay mode – Tap Cash, Card, UPI, etc. Tapping more than one lets you split the tender across them.
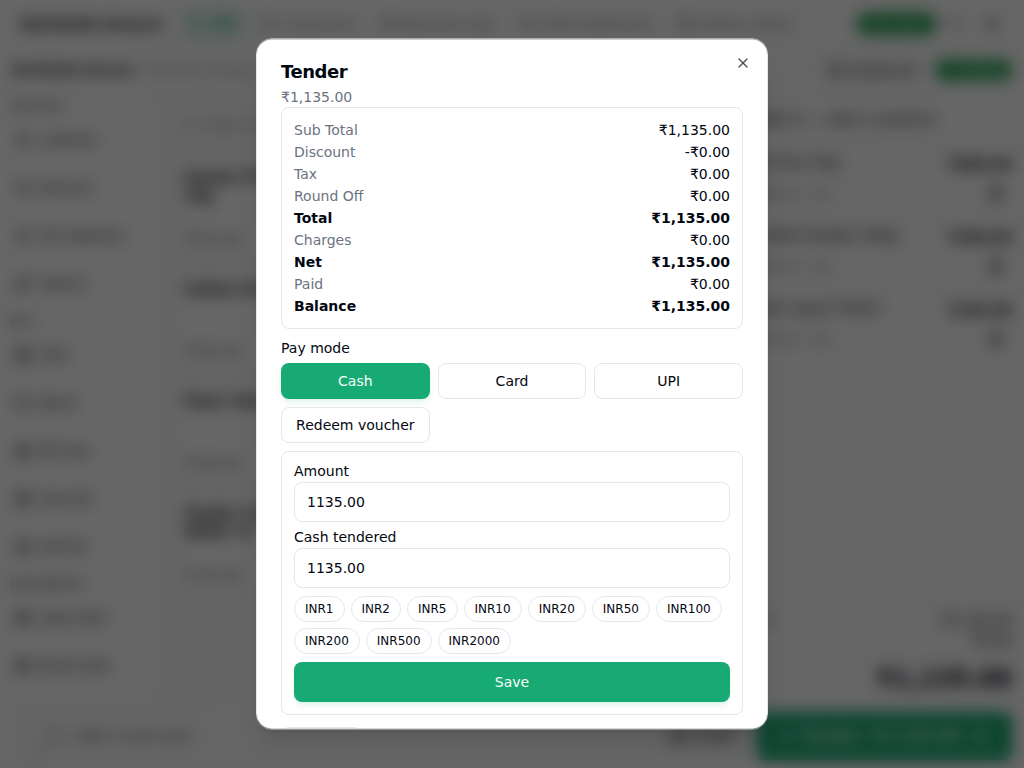
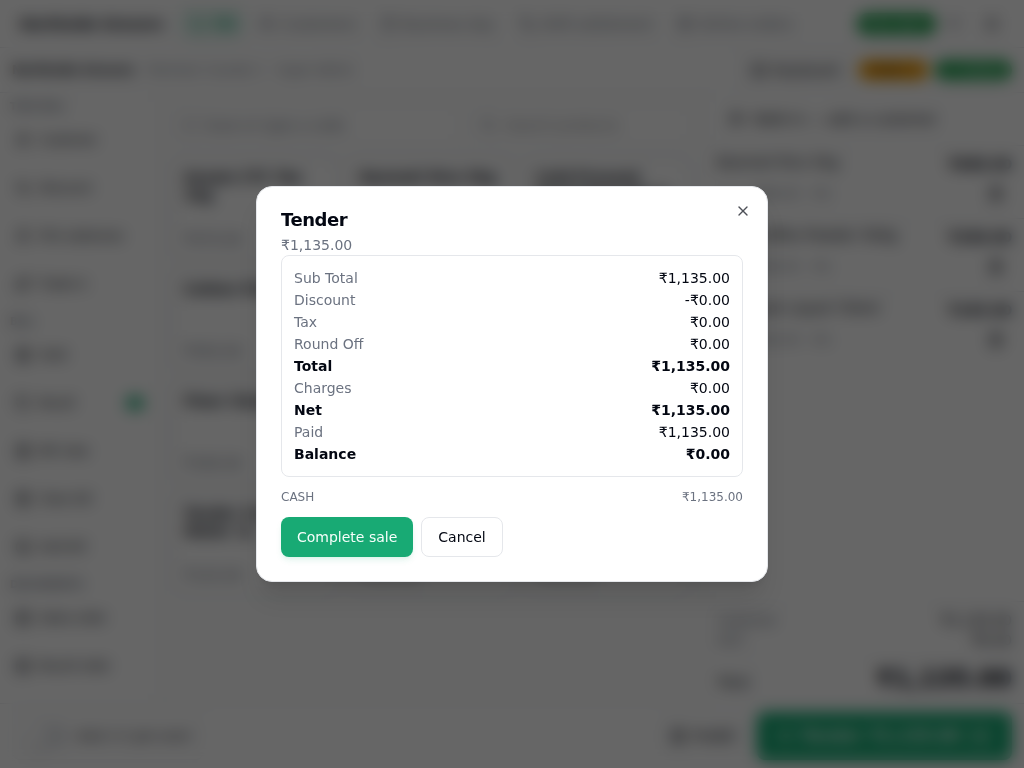
Complete sale – Only enabled once Balance reaches zero (in your workspace's own currency). This is the point of no return - it mints the real receipt reference and moves stock.
Completing the sale
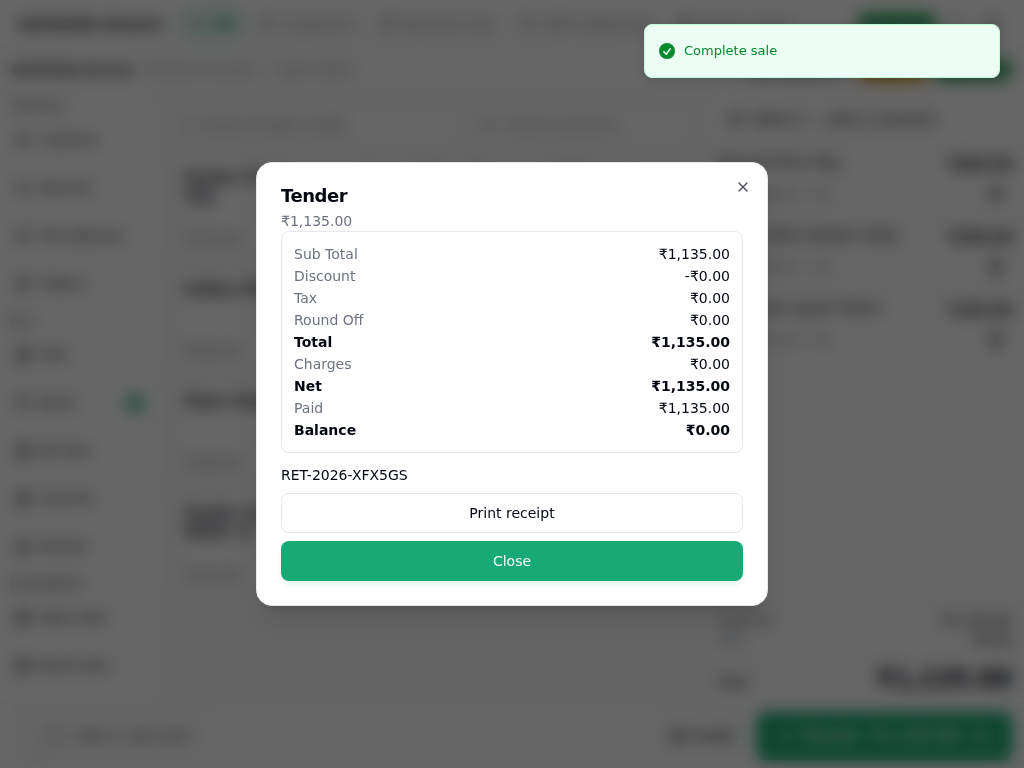
The reference number (e.g. RET-2026-JL4SDW) is the bill's permanent id -
write it down for any refund/return/exchange conversation later. Print
receipt sends to whatever printer is configured; Close starts a fresh,
empty bill on the till, ready for the next customer.
Looking up a completed bill
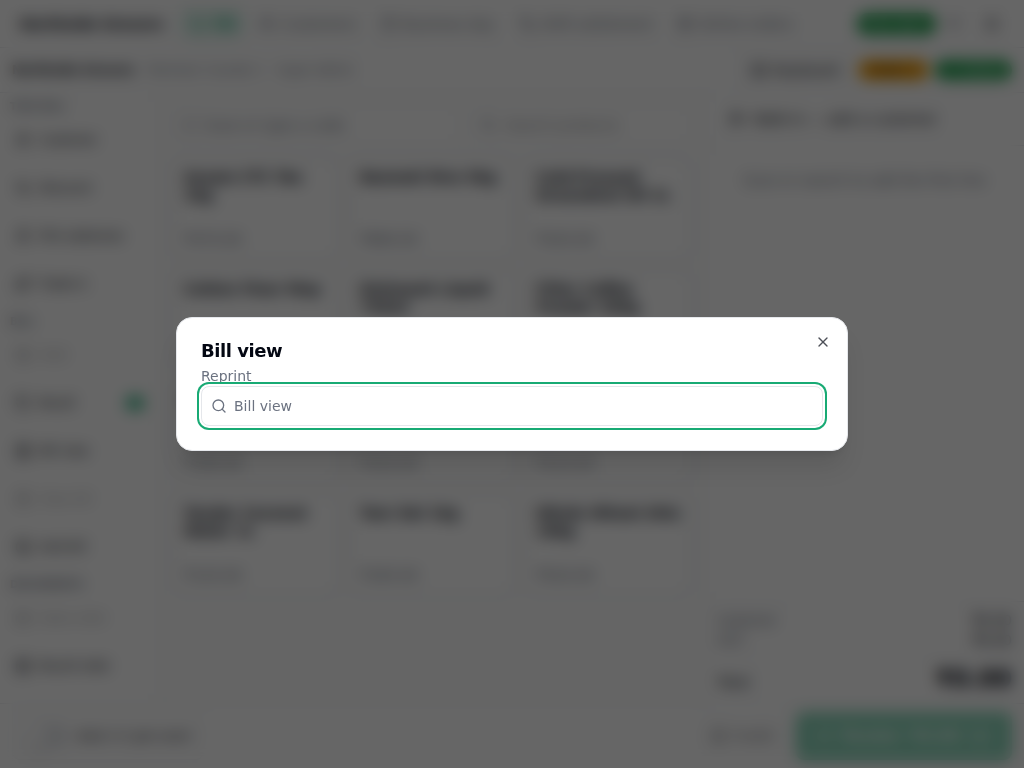
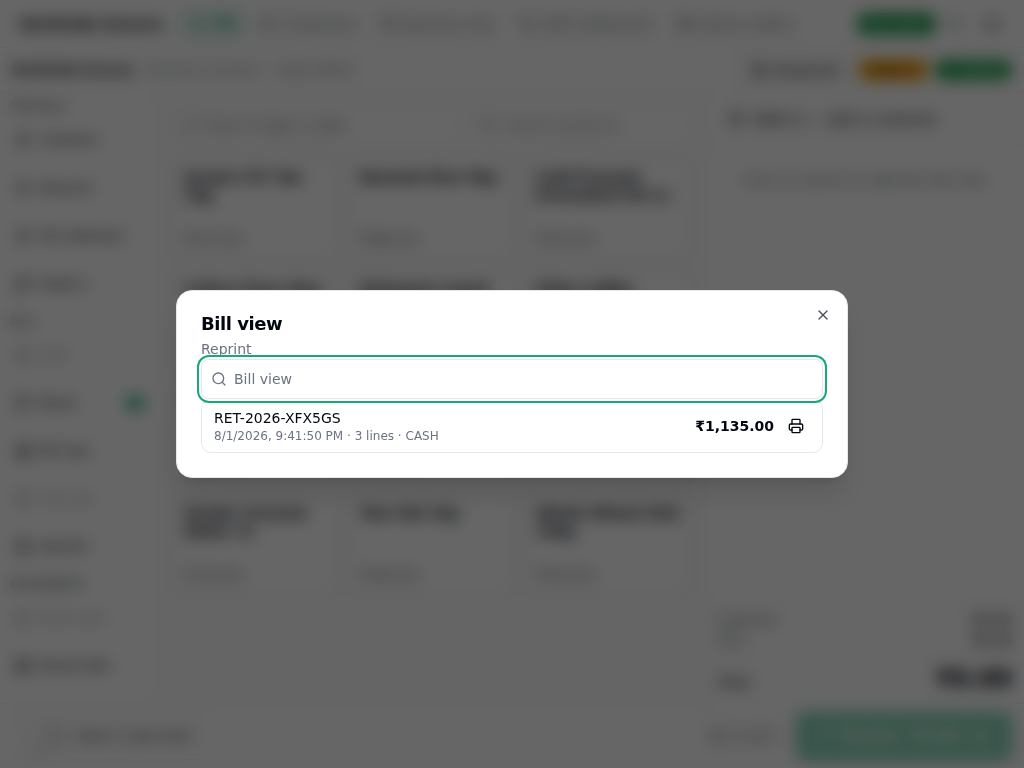
Click Bill view from the till toolbar at any time, then search by reference number or customer.
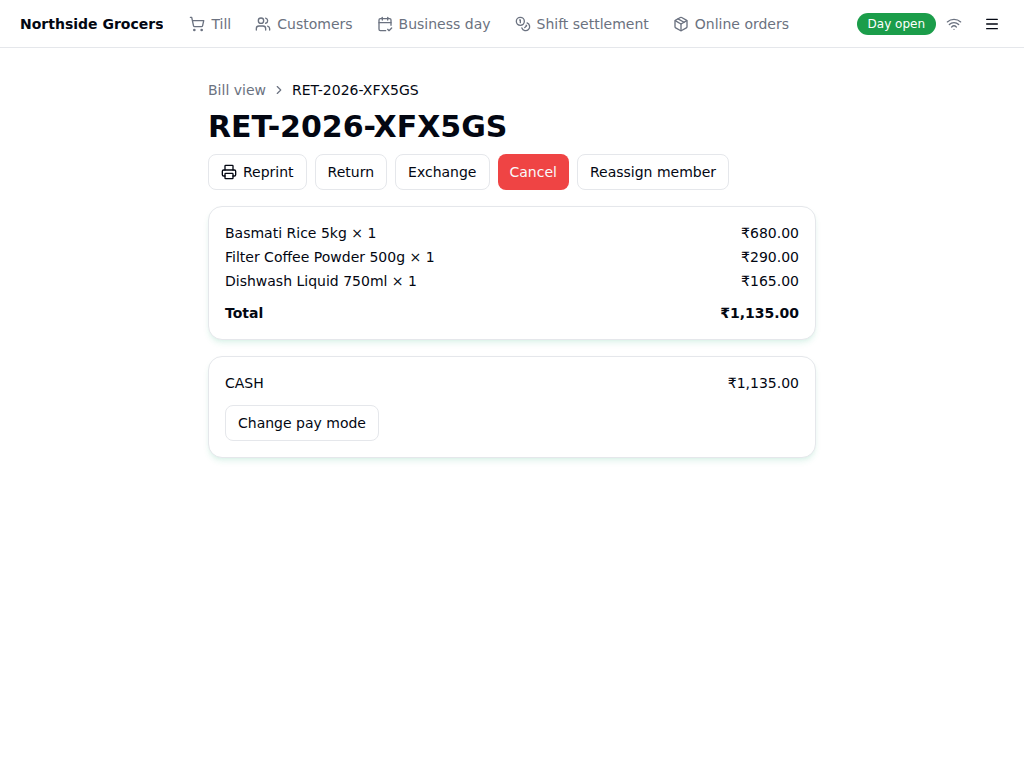
Reprint – Print the receipt again - no limit on how many times.
Return / Exchange / Cancel – Return restocks the item and credits the customer's wallet (or refunds
a tender). Exchange swaps for something of equal or greater value in
one step. Cancel needs a supervisor's PIN and fully reverses the sale,
restocking everything.
Cancelling a completed bill
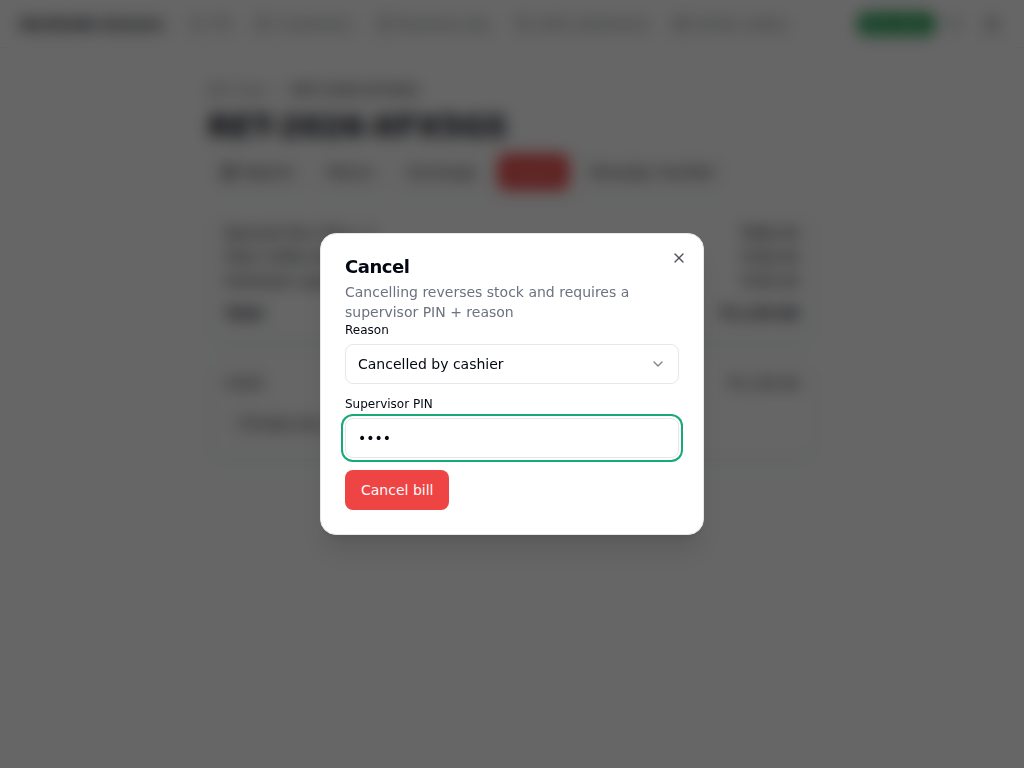
Pick a Reason (required - it's what shows up later in reporting), then have a supervisor type their own PIN - not yours - right there at the till. Click Cancel bill.
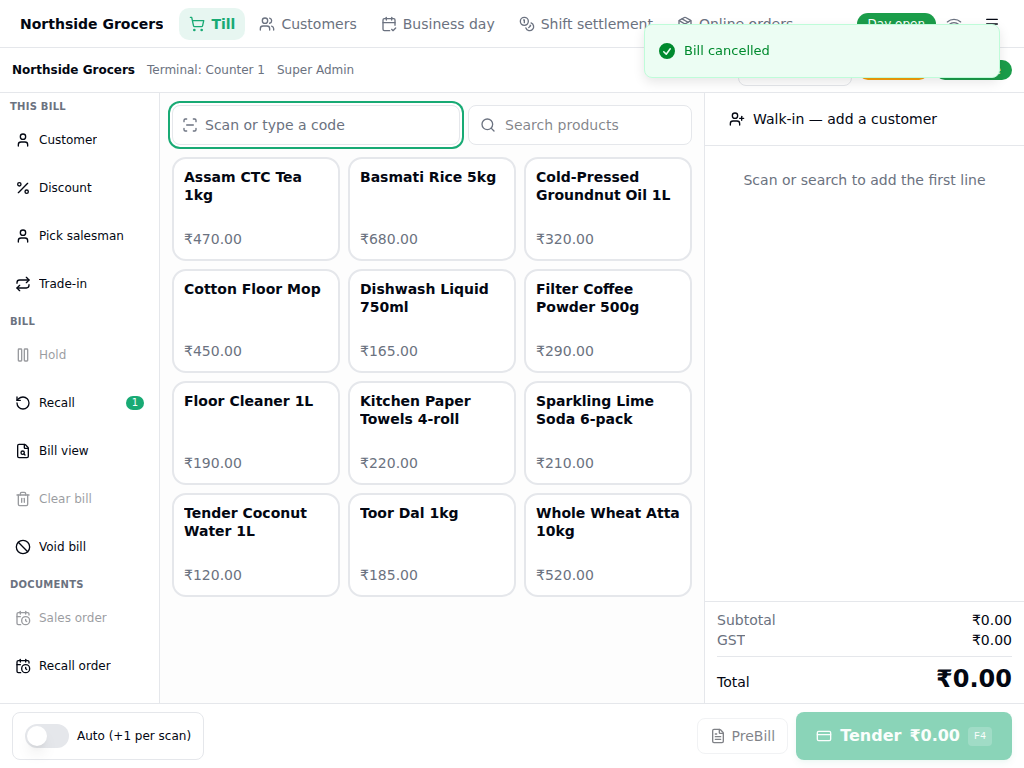
A cancelled bill isn't just marked void - every line's stock is genuinely restocked, exactly reversing what the original sale consumed. This is why it needs a supervisor: it's a real, audited reversal, not a cosmetic status flip.
Other things you'll find on the till toolbar
A few more toolbar buttons worth knowing, even if you won't use all of them every shift:
- Trade-in - credit a customer for something they're handing back (e.g. an old device) against this bill.
- Pick salesman - attribute this sale to a specific salesperson for commission reporting, distinct from the cashier who's actually billing.
- Sales order / Recall order - save the current lines as an order to fulfil later (e.g. a customer paying an advance for a delivery), then bring it back and convert it into a real bill when it's ready.
- Quote / Recall quote - save a negotiated price list for a customer without committing to a sale yet; prices stay editable right up until you convert it.
- Voucher creation - issue a gift card or exchange voucher with its own QR code, redeemable at any till later.
- Payment (in the toolbar, distinct from Tender) - records cash moving into or out of the drawer that ISN'T a sale, e.g. petty-cash float top-ups or supplier cash payments:
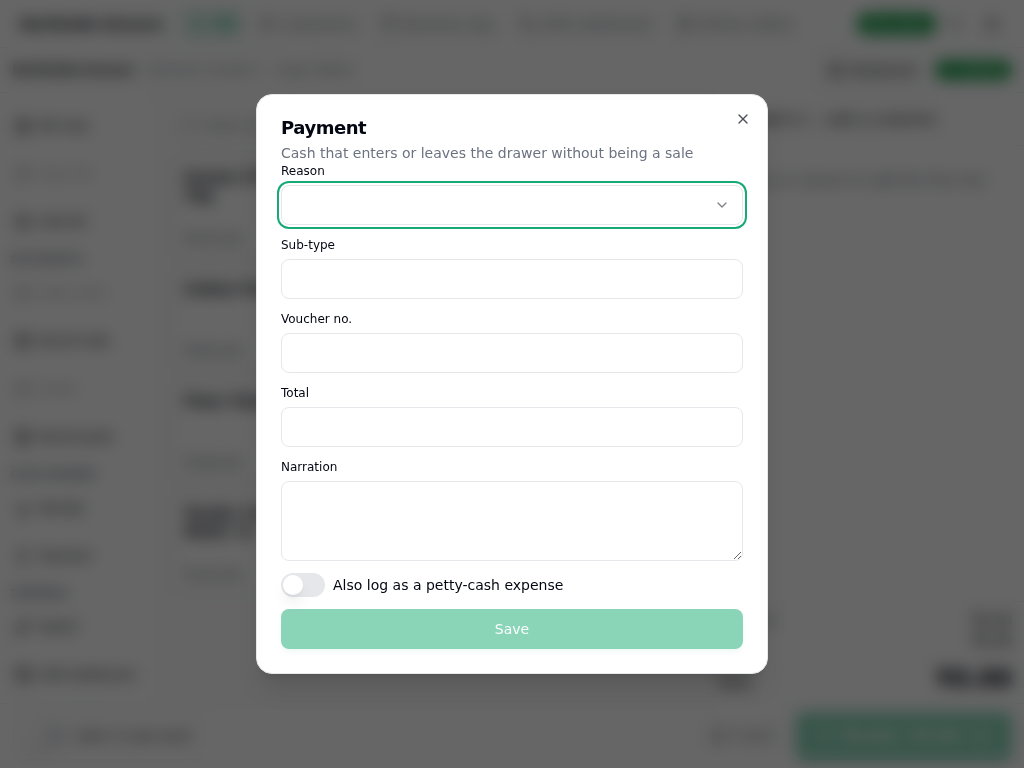
Pick a Reason, optionally log it as a petty-cash expense too, and Save - this shows up in your shift settlement's cash reconciliation, same as every sale.
Closing the day
At the end of trading, an owner/admin/manager goes to Shift & day → Day-end on the POS hub. The checklist has to be fully green before you can close - it's a guardrail, not a formality:
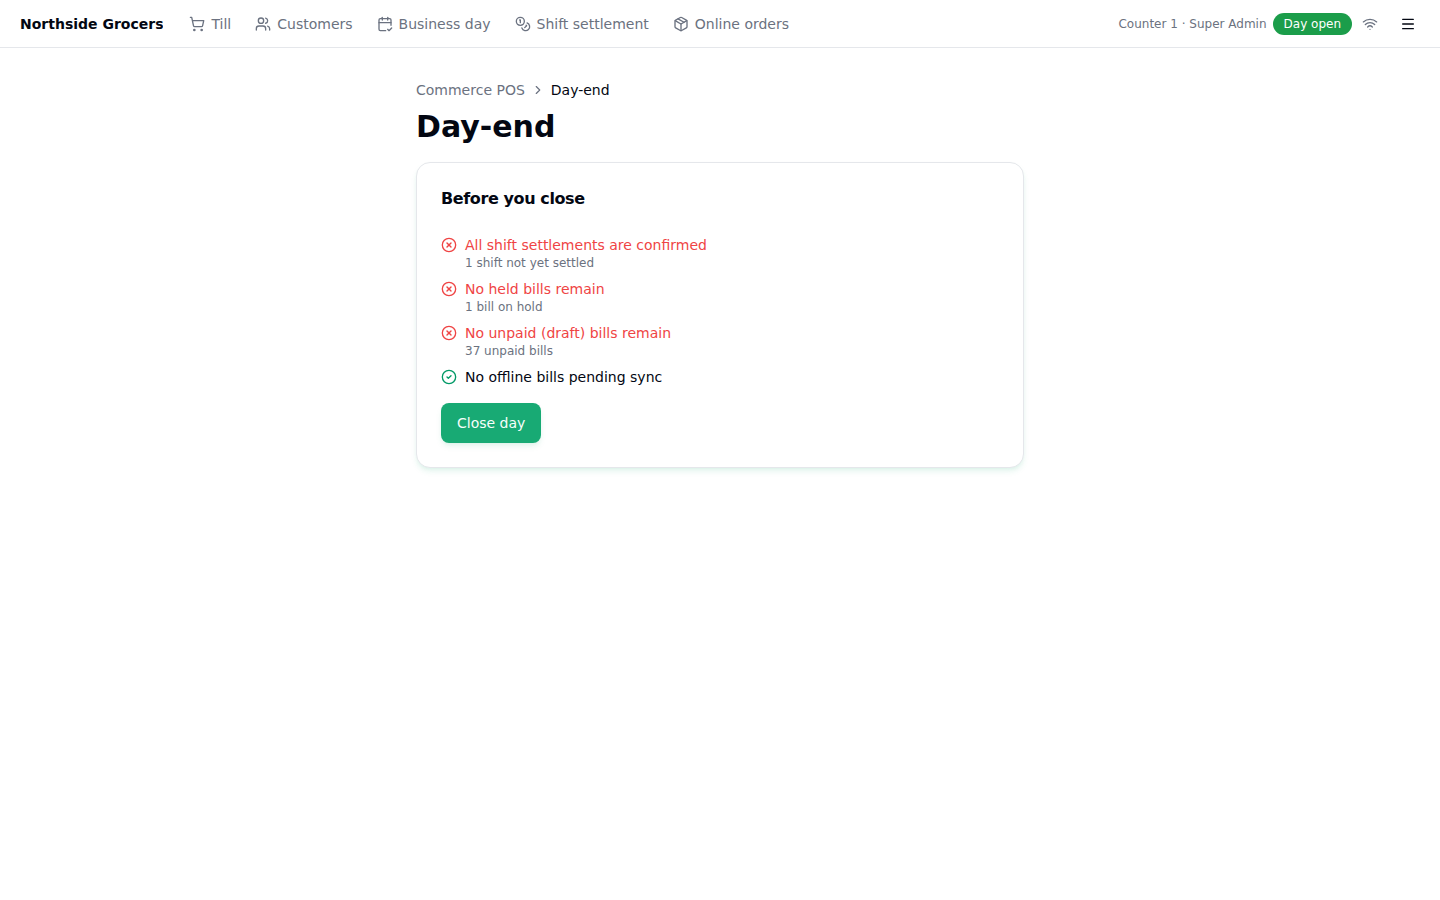
- Shift settlements confirmed - every cashier has counted their drawer and signed off (Shift settlement, on the bar and under Shift & day).
- No held bills - nothing left parked mid-sale.
- No unpaid (draft) bills - every bill that was started got tendered or voided.
- No offline bills pending sync - only relevant if you use offline billing.
Once every line is green, Close day freezes a Z-report (total sales, tax, and a breakdown by pay mode) that can never be edited again. If something was closed by mistake, an owner can request a reopen, which needs a second owner's approval before it takes effect.
Who can do what
| Action | Cashier | Manager | Admin / Owner |
|---|---|---|---|
| Sign in, work the till | ✓ | ✓ | ✓ |
| Open/close the business day | ✗ | ✓ | ✓ |
| Register a customer, attach one to a bill | ✓ | ✓ | ✓ |
| Hold a bill, recall it from any till | ✓ | ✓ | ✓ |
| Apply a discount within their own ceiling | ✓ | ✓ | ✓ |
| Approve a discount above the ceiling | ✗ | ✓ | ✓ |
| Cancel a completed bill | needs supervisor PIN | ✓ | ✓ |
| Log a drawer payment/receipt (non-sale cash) | ✓ | ✓ | ✓ |
| Confirm shift settlement | own shift | any | any |
Related: Manual: Retail admin & back office · Manual: Food production
Booking & availability
Let customers book appointments, tables or rentals - set your availability once, then take bookings through a widget, a public link or the AI chat, with confirmations and calendar invites.
Manual: Retail admin & back office
Setting up products, suppliers, purchase orders, goods receipt, and the buying chain for a retail workspace.